Showing posts with label Beauty. Show all posts

Saturday, June 4, 2016

Summer Fashion & Beauty Essentials

 :

It's hot. It's sticky. It's humid. It's summer time! Oh, the joys of boiling in the heat. ;) If you couldn't already tell, summer isn't my favorite season by a long shot, but you can still enjoy it with a few essentials! These are my personal must-haves for the hot summer months. 

Kimono: If you didn't know already, I am majorly obsessed with kimonos. They are so light, airy, and versatile. You can throw them over anything and instantly have a put-together outfit. They are everywhere in stores and come in many different colors and patterns. I can't get enough of them! They're perfect for these hot, sticky, summer months because they're so flowy and thin. You can throw them over a tank top and a pair of capris and call it good.

Straw Hat: I've become quite fond of hats recently and a straw hat is a great summer essential because it's light and there are tiny holes throughout making it easy for a nice breeze to flow right through. If there's actually a breeze, that is! ;) You can wear straw hats with anything and they just look adorable. They also serve a purpose by keeping the sun out of your eyes.

Sandals: Sandals are just such lifesavers. They are open, so they keep your feet cool while you're walking around in the hot sun all day. My favorite sandals are Croc sandals. No, I'm not sponsored, I just really love Crocs. I have these Croc sandals and I wear them all of the time. I wear them pretty often in the summer because they go with anything and they are light and easy to slip on and off.

Scrunchies: I've loved scrunchies since I was a little girl. I have really thick hair and I find that they pull and tug less on my hair when I need to throw it up in a bun or pony tail. They also come in many different patterns and colors, which I love. You know me! I like to coordinate with my outfits! ;) I wear my hair up in a messy bun pretty often in the summer, so scrunchies are a must-have for me.

Iced Coffee: Oh, man. I LOVE coffee so much! I need that caffeine to get me up in the morning and get a start on my day. Iced coffee is a glorious thing when it's hot outside. I find that when I drink coffee straight out of the pot, I end up sweating and get so hot and toasty when it's already too warm outside. When I drink iced coffee, I'm much more refreshed and cooled off at the same time. Caffeine is important, ladies! Am I right?!

Waterproof Mascara: They say that the eyes are the windows to your soul. I want my eyes to look fluttery and full when people look into my soul! Haha While waterproof mascara is a pain to scrub off, it's also a lifesaver at the same time. When you're out in the heat and sweating to death, your mascara won't budge. 

Setting Spray: This stuff is just magical! After I do my makeup, I spritz my face a few times with this stuff and my makeup stays put. I absolutely love it. It's so nice to know that your face won't melt when you're out and about sweating yourself to death. I highly recommend it. Right now, I'm really loving the Loreal setting spray. It's pretty fabulous. 

Sunscreen: Ladies! If you don't do anything else to protect yourself from the sun, please at least wear sunscreen! It will protect your precious skin from the damaging rays. It will protect you from skin cancer and sunburns. Trust me. A few years ago, I got sun poisoning because I did not lather on that sunscreen. I regretted it more than anything. My skin was red, swollen, puffy, bruised, and full of boils. It was a very painful experience. Wear. Sunscreen. Please!!

Tinted Lip Balm: I am a lipstick lover, but sometimes I just feel like it melts off when it's boiling outside. My favorite lip product for the summer is a tinted lip balm. Not only is it moisturizing, it gives off a nice color without being thick and heavy. I recommend looking for a tinted lip balm with sunscreen in it. Your lips can burn too, so it's important to protect those babies!

Do you have some summer essentials that I haven't mentioned in this post? Let me know in the comments! 


Tuesday, September 16, 2014

The Top 5 Lip Products That Are Fall Must Haves


I don't know about you, but I'm pretty pumped for Fall. It's my very favorite season! I just love all the crunchy leaves, the thick layers, and the wonderful colors. Not only do I love wearing Fall colors, but I love them on my lips too!

I've conjured up five of my favorite Fall lip products this year. If you are a lip product junkie like me, then you will truly appreciate how cheap and how beautiful these products are.


1. Elf Matte Lipstick in the color, Rich Red- I absolutely love this color! It cost me one dollar and I couldn't be more thrilled with it. The color pigmentation is fabulous as you can very well tell by the picture. It glides on so effortless and smooth. Also, if you have dry lips, this does not accentuate them I find. I developed pretty dry and flaky lips while photographing these swatches, so I would know!


2. Loreal Color Riche Lipstick in the color, 560 Saucy Mauve- This lipstick is the perfect "everyday" color to slap on and head out the door. It's this beautiful, natural, mauve color. I love it on my fair skin tone. I think that this color would even work on tan to dark skin tones as well. It seems like a pretty universal shade. It glides on smooth when applied, and has beautiful pigmentation as well.


3. Milani Color Statement Lipstick in the color, Uptown Mauve- Okay. Let's just sit here and appreciate how stunning this pink/purple shade is. Are you staring? Are you appreciating? If you wanted to wear something pink in the Fall season, this is definitely your shade! It is super gorgeous! The color pigmentation is equally as fabulous as the other lipsticks mentioned previously. This lipstick also smells like some kind of candy. I'm not even kidding! I thought that was a pretty sweet bonus. The lasting power is really wonderful as well! I'm telling you, shop for drugstore lipsticks! They're the best!


4. NYC Liquid Lipshine Lipgloss in the color, Midtown Mulberry- This is a brand that I was really surprised about that had great lip products. I was a bit skeptical to try it out at first, because I haven't had much luck with their products. I really should have given their lippies a chance because this lipgloss is awesome! It stays on forever! Even when the shine goes away, you still have the beautiful color left underneath. Lesson learned. Never judge a company by only a handful of products. Another thing I really love about NYC is that their products are super cheap. They are now a new favorite. 


5. Maybelline Moisture Whip Lipstick in the color, Rare Ruby- I have had this lipstick for a long, long time and I love it! Most of the time I wear it more sheer, but as I've gotten older, I've been experimenting with brighter and darker shades. This lipstick is definitely moisturizing just like its title claims. My lips never feel dry when wearing this, so that's extremely awesome! I actually purchase this at a Dollar Tree for one dollar which you just can't beat! Am I right, ladies? 

Do you have any go-to lipsticks for the Fall? Let me know in the comments so we can discover new lip products together! 

Sunday, February 16, 2014

How To: Easy Braided Half-up, Half-down Hairstyle

Today's tutorial is a cute and easy half-up, half-down hairstyle that you can wear for any occasion. Like any hairstyle, you can dress it up or down. I personally feel like this is a cute one to wear to church. How fitting since today is the Lord's day! :) 

If you went to church this morning without any time to fix your hair, I am here to save the day in time for services for tonight! Just follow this simple tutorial. Go from meh to magnificent!


What You'll Need:
- Brush
- Bobby Pins
- Hair Elastics
- Hairspray (optional, but recommended)

Step 1: Take a section of hair starting from the top of the ear.

Step 2: Braid a regular 3 strand braid for both sections and tie off the ends with an elastic.

Step 3: Grab your bobby pins and pin one of your braids around your head. Make sure you hide the elastic at the end the best you can.

Step 4: Do the same thing for the other braid. Wrap the other one around your head as well, but directly under the first braid. Pin it securely with bobby pins.  Try the best you can to hide the bobby pins. Spray that gorge mane with hairspray and you're good to go!

Beautiful! Now, go to church tonight with a cute new hairstyle! ;)


Saturday, February 15, 2014

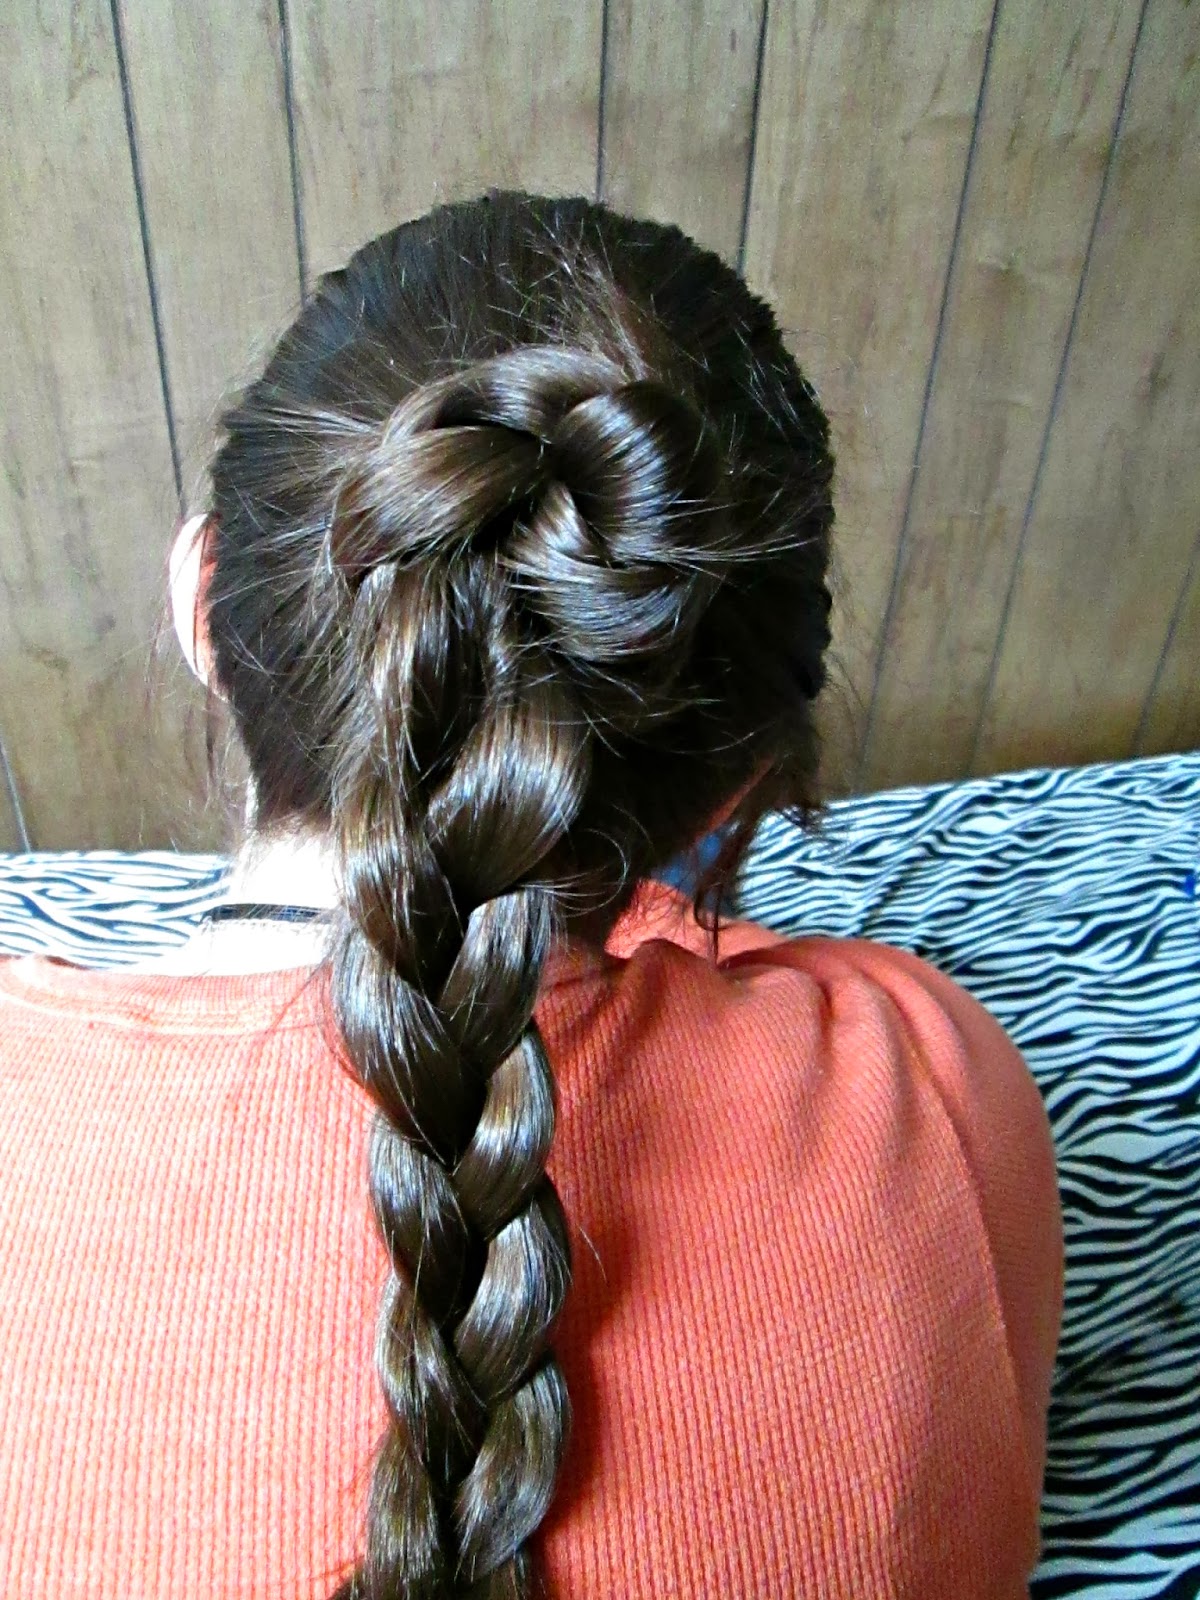
3 Easy Updos

Today, I'm giving you 3 easy and quick hair tutorials. These hairstyles are casual, but can be dressed up as well. You can add any accessories you'd like. They're also perfect for that hot summer day that will be here before you know it! They are super simple to achieve and perfect for that it-looks-like-I-tried-but-didn't kind of look. hahaha


What You'll Need:
- Hair Ties
- Hair Elastics
- Brush
- Bobby Pins
- Hairspray (optional, but recommended) 

Step 1: Brush your hair and gather it into a ponytail. Smooth out any bumps and tie it with a hair band.

Step 2: Split your pony tail into two sections.

Step 3: Braid a regular 3 strand braid on both sections of hair. Tie the ends with elastics.

Step 4: Wrap one of the braids around the base of the ponytail and pin it securely to your head.

Try to hide the bobby pins the best you can.

Step 5: Wrap the other braid around the base as well and secure it with bobby pins. Again, try the best you can to keep them hidden. Spray some hairspray to lock in your style.

 Viola! You're done!


Step 1: Brush your hair and put your hair up in a ponytail.

Step 2: Take your elastics and wrap it around your hair every 3 or so inches all the way to the end of the hair.

This is what it should look like all the way down the ponytail.

Step 3: Pull the hair between the elastics gently to create a "bubble" effect. You can pull it as much or as little as you want. You can make it really thick and full, or more on the sleek and proper side. Now, you can hairspray that gorge pony, and call it a day!

You're Finished!


Step 1: Brush hair and pull it into a ponytail.

Step 2: Fishtail your hair all the way down the hair shaft. If you don't know how to do a fishtail braid, you can CLICK HERE to my tutorial.

Step 3: Pull the braid gently. This will make the hair thicker and more casual and "messy." You may hairspray your hair to lock in the style.

That's right girl, you're done! You are now free to accessorize it with something cute like a bow that I used here.


All I did here, was wrap the fishtail braid that we just created around the base of the ponytail and pinned it with bobby pins. I stuck the bow at the top toward the side of the head. Super cute!

Let me know if you've tried any of these hairstyles and let me know which one is your favorite! :)

How To: Fishtail Braid

I always thought that the Fishtail Braid looked really, really complicated. What I thought would be one of the hardest braids to learn, is actually one of the easiest. Once you get the hang of it, it's as easy as a regular old braid! I can now do it without even looking in a mirror!


What You'll Need:
- Hair tie or elastic
- Hairbrush
- Spray bottle filled with water (optional)

Step 1: Brush your hair. This is a very important step! It's the first thing you should always do before attempting any kind of hairstyle. It prevents tangles, broken hairs, and messy hairdos. After you've brushed your hair, you can lightly spray the hair with water to make it slightly damp if you'd like. This will make it easier to braid the hair. Do not over do it! You just want the hair to be damp, not soaking wet. I didn't have a spray bottle available to me, so I just braided with dry hair.

Step 2: Split your hair into two sections.

Step 3: Take a smaller section of hair from the bigger section of hair, and cross it over to bring it to the other side.

Step 4: Take a small section of hair from the other side, and cross it over to bring it to the other side. Continue this step all the way to the bottom.

This is what it looks like when you have fishtailed halfway down the hair shaft.

You're done! You've done the fishtail braid! With some practice and patience, you can easily achieve this hairstyle. Just keep trying! Don't give up!

Here's a closeup of the fishtail braid.

I just wanted to say a huge thank you to my sister, Liz, for being my hair model! 

LinkWithin

Related Posts Plugin for WordPress, Blogger...