Saturday, February 15, 2014

3 Easy Updos

Today, I'm giving you 3 easy and quick hair tutorials. These hairstyles are casual, but can be dressed up as well. You can add any accessories you'd like. They're also perfect for that hot summer day that will be here before you know it! They are super simple to achieve and perfect for that it-looks-like-I-tried-but-didn't kind of look. hahaha


What You'll Need:
- Hair Ties
- Hair Elastics
- Brush
- Bobby Pins
- Hairspray (optional, but recommended) 

Step 1: Brush your hair and gather it into a ponytail. Smooth out any bumps and tie it with a hair band.

Step 2: Split your pony tail into two sections.

Step 3: Braid a regular 3 strand braid on both sections of hair. Tie the ends with elastics.

Step 4: Wrap one of the braids around the base of the ponytail and pin it securely to your head.

Try to hide the bobby pins the best you can.

Step 5: Wrap the other braid around the base as well and secure it with bobby pins. Again, try the best you can to keep them hidden. Spray some hairspray to lock in your style.
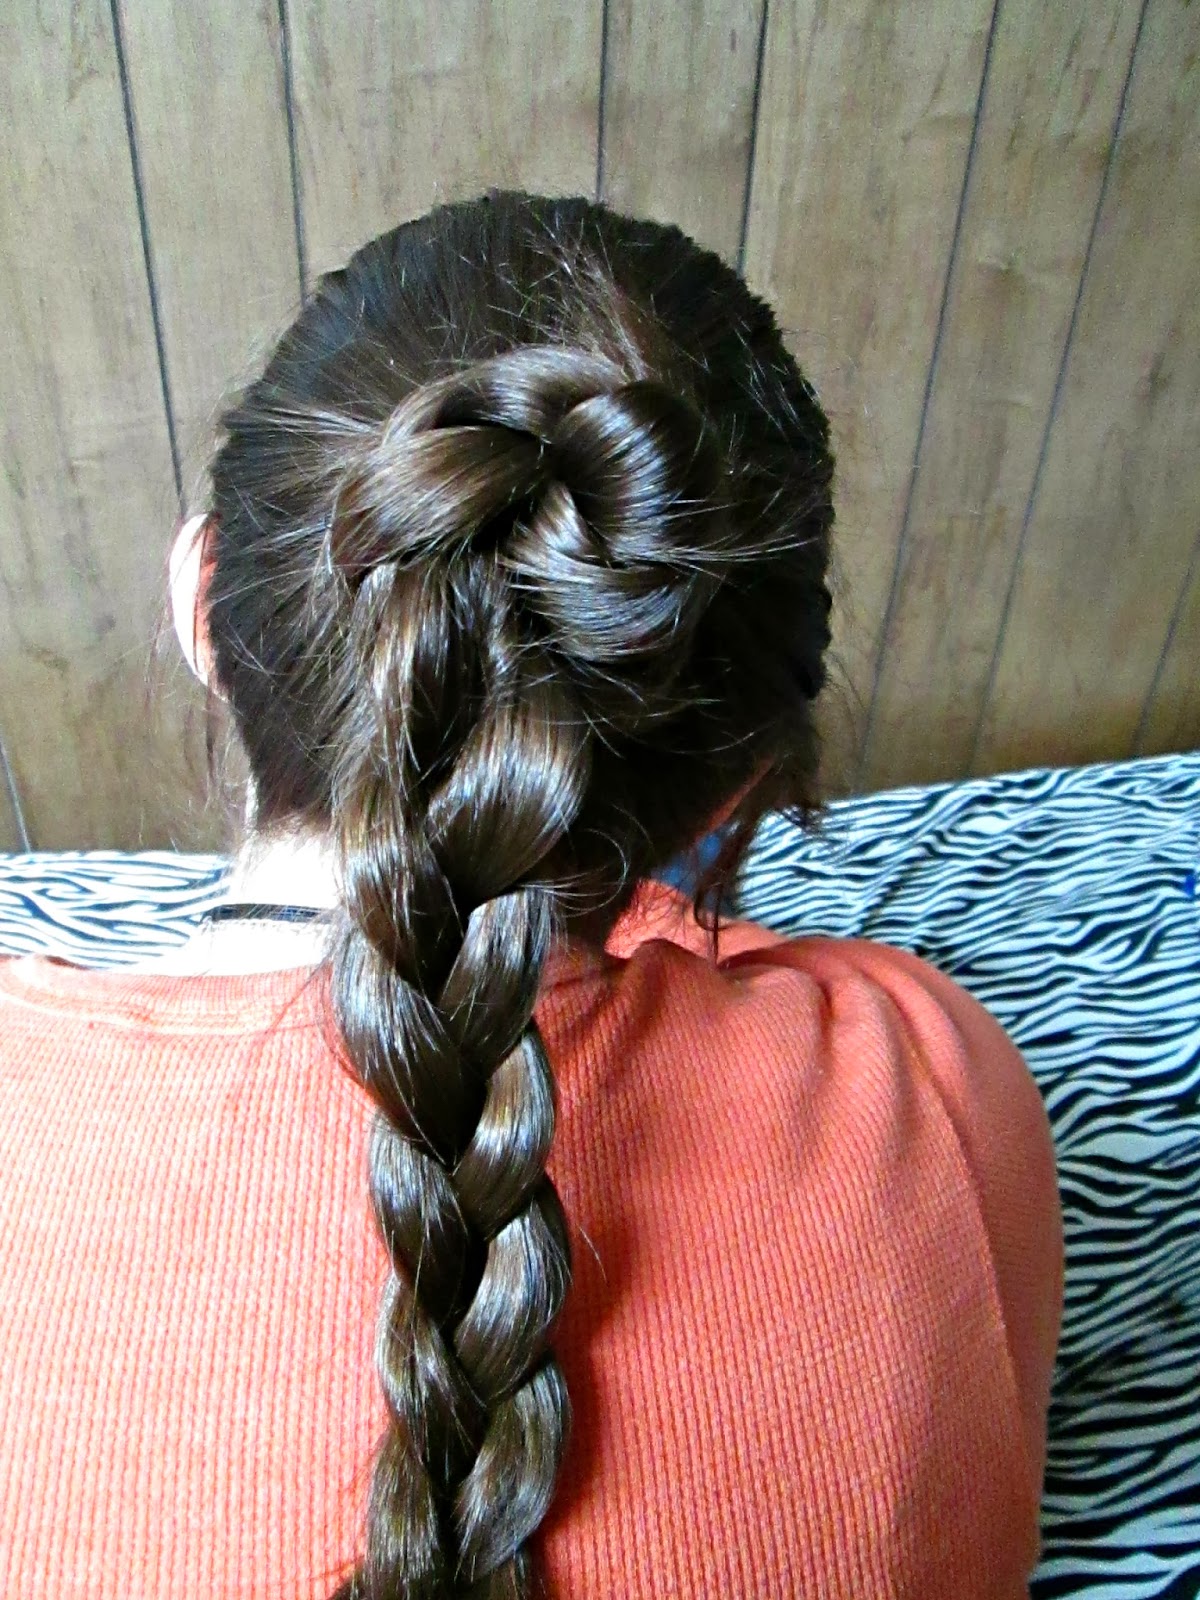
 Viola! You're done!


Step 1: Brush your hair and put your hair up in a ponytail.

Step 2: Take your elastics and wrap it around your hair every 3 or so inches all the way to the end of the hair.

This is what it should look like all the way down the ponytail.

Step 3: Pull the hair between the elastics gently to create a "bubble" effect. You can pull it as much or as little as you want. You can make it really thick and full, or more on the sleek and proper side. Now, you can hairspray that gorge pony, and call it a day!

You're Finished!


Step 1: Brush hair and pull it into a ponytail.

Step 2: Fishtail your hair all the way down the hair shaft. If you don't know how to do a fishtail braid, you can CLICK HERE to my tutorial.

Step 3: Pull the braid gently. This will make the hair thicker and more casual and "messy." You may hairspray your hair to lock in the style.

That's right girl, you're done! You are now free to accessorize it with something cute like a bow that I used here.


All I did here, was wrap the fishtail braid that we just created around the base of the ponytail and pinned it with bobby pins. I stuck the bow at the top toward the side of the head. Super cute!

Let me know if you've tried any of these hairstyles and let me know which one is your favorite! :)

How To: Fishtail Braid

I always thought that the Fishtail Braid looked really, really complicated. What I thought would be one of the hardest braids to learn, is actually one of the easiest. Once you get the hang of it, it's as easy as a regular old braid! I can now do it without even looking in a mirror!


What You'll Need:
- Hair tie or elastic
- Hairbrush
- Spray bottle filled with water (optional)

Step 1: Brush your hair. This is a very important step! It's the first thing you should always do before attempting any kind of hairstyle. It prevents tangles, broken hairs, and messy hairdos. After you've brushed your hair, you can lightly spray the hair with water to make it slightly damp if you'd like. This will make it easier to braid the hair. Do not over do it! You just want the hair to be damp, not soaking wet. I didn't have a spray bottle available to me, so I just braided with dry hair.

Step 2: Split your hair into two sections.

Step 3: Take a smaller section of hair from the bigger section of hair, and cross it over to bring it to the other side.

Step 4: Take a small section of hair from the other side, and cross it over to bring it to the other side. Continue this step all the way to the bottom.

This is what it looks like when you have fishtailed halfway down the hair shaft.

You're done! You've done the fishtail braid! With some practice and patience, you can easily achieve this hairstyle. Just keep trying! Don't give up!

Here's a closeup of the fishtail braid.

I just wanted to say a huge thank you to my sister, Liz, for being my hair model! 

Friday, February 14, 2014

T-Shirt Pillow D.I.Y

Do you have old t-shirts laying around that you never wear anymore? Are they too tight? Do you still love them anyways? Can't bear to part with them? If you answered yes to any of those questions, then this is the tutorial for you!
What You'll Need:
- Old t-shirt
- Scissors
- Pins
- Stuffing
- Sewing Machine 
- Needle and Thread
------------------------------------------------------------------------------------


Step 1: Choose an old t-shirt. Maybe you have one that's too small, or maybe you just need to make room for yet another t-shirt. ;)

Step 2: Take your scissors and cut a square out of your t-shirt. You can make this however big or small you would like. I cut mine pretty close to the graphic, but you can do whatever you like. 


 It should look like the picture above when you have it cut out. The sleeves are gone and you have two pieces of material. A front and a back.

 Step 3: Pin right sides together. The graphic on the shirt should be facing down. After you've sewn it, you will be able to turn it inside out and see your graphic on the front.

 Step 4: Sew right sides together. Don't forget to leave a small hole for the stuffing!!

 Step 5: After you've sewn the right sides of the t-shirt together, (while leaving a hole for you to put the stuffing in) you can turn it inside out and put the stuffing in. You can use a wooden dowel or some kind of stick to help you put the stuffing in. The more stuffing that you have inside your pillow, the fluffier and nicer it will look.

 Step 6: Hand-stitch the hole. Just sew by hand as you normally would.


 Congrats! You've just made a simple, but awesome t-shirt pillow! Now, pat yourself on the back and go  make a delicious sandwich. You deserve it, Champ.

Caramel Chocolate Popcorn Recipe

I was surfing Pinterest and I came across this awesome, easy recipe for Caramel Chocolate Popcorn. I modified it just a little bit and decided to whip it up today! You can find the original recipe HERE. I doubled this recipe so that it was enough to feed my family of 5. If you are just making this yourself, follow the original recipe. Enjoy!

Caramel Chocolate Popcorn:

4 packages microwaveable popcorn, popped

2 cup butter
1 cup brown sugar
2 tbsp light corn syrup
1 tsp vanilla
8 tbsp marshmallow cream
Chocolate chips


Instructions:
Using a medium sauce pan, melt butter over medium heat. Add in brown sugar, corn syrup and vanilla. Stir to combine. Add in marshmallow cream and stir until completely melted and mixture is smooth.

Place popped popcorn, careful not to add kernels, to a large mixing bowl. It's practically impossible to keep all kernels out, but just do the best you can. Drizzle caramel mixture over popcorn and toss to combine. Mixture will be very sticky and harden fast so do this quickly.

Spread wax paper on a large cookie sheet. Spread the caramel popcorn on the cookie sheet. Add chocolate chips to a ziplock bag. Melt in the microwave in 15 second increments until chocolate is melted. Seal the bag and knead it to mix together. 

Snip the end of a corner of the bag off and drizzle it on the popcorn. Don't snip off a teeny tiny corner, or you'll end up squeezing it too hard to get the chocolate out and bust the bag like I did. Oops!  Just snip a decent size hole. 

Leave Popcorn on cookie sheet for a while so that the chocolate and caramel mixture can harden. Store in an airtight container. Viola! 

LinkWithin

Related Posts Plugin for WordPress, Blogger...